Pages

Sunday, April 3, 2011

Blackened Salmon


It is starting to look like spring has really arrived! The skies have been a brilliant robin’s egg blue with white puffy clouds, the trees are budding, the birds abound and the grass is greening up. I live in a seriously beautiful place at the foothills of the Rocky Mountains in Northern Colorado. When it is so beautiful outside, I want to enjoy long walks and don’t get back home to cook quite as early as I did in the winter. I still want to have something wonderful to serve my family and friends, but I want it to be something I can get on the table quickly. My blackened salmon and lemony risotto fit the bill perfectly. So today I will post the Salmon recipe.
Salmon- you have heard multiple times how good it is for you. Seriously, we should eat salmon a couple times a month or more. Some say every week but that can be difficult. A decade or so ago, I kept hearing about the health benefits of salmon and I determined to cook it more. However, I had eaten it a few times and didn’t really think I liked it. Fish has been a slowly acquired taste for me. So I looked for a way to cook it that I would like and settled on blackened. I found out I that I enjoyed salmon cooked this way!
“Blackened” means that it has a nice crust of spicy goodness that gets dark and intense. It does not mean to char the fish black. I have made this for many years, mixing up the spice concoction by taste and mood of the day. It always varies. But, in order to share this recipe I have been endeavoring to come up with a basic mix of spice and herbs. The one here is not too spicy and can be adapted. For kids or those who dislike heat in spice, skip the red pepper and cumin. If you want to make this a little different, skip the dill and thyme, add more cumin and a tsp of cinnamon for a Moroccan like flair. For a lemon-spice salmon, lower the pepper and cumin and add some lemon juice before the spice mixture and at the end to finish the dish off. You should experiment to find out what you like but first try it this way and see what you think.
To skin or not to skin…Some people prefer to leave the skin on salmon to serve but I remove the skin. If you like the skin, skip those steps and leave it on.  Just put the spice on the skinless side and cook it up. Another preference I have is to cook the salmon a little longer than some folks do. We like it that way but if you prefer, reduce the cooking a bit. Recipes are not rules; they are guidelines to be individualized!
As you can see in the photo, I like to serve this with a risotto or rice dish. I will post my Lemony risotto recipe next for a nice company meal. I add a steamed vegetable or roasted asparagus and perhaps a salad with lemon vinaigrette with a light dessert for the menu. If I am low on time, I serve this salmon with plain basmati rice and it is still a wonderful meal and perhaps more kid friendly.
How to make Blackened Salmon

Select a nice piece of salmon, about 1/3 lb per person. Any wild caught salmon can be a good choice. I like it much better than farm raised and so I usually find it worth the price. I like to use wild sock-eye salmon but I get whatever is a good deal and looks the best for the money. I have no problem using frozen salmon; it still tastes great.
Fillets should have firm texture, not separating or feathering. It should not smell fishy or feel slimy. I like thick pieces of fish if available but choose quality over thickness. Color varies with the type of salmon so don’t use color as a guide. Cook salmon as soon as possible, one or two days is best. If you are keeping it longer, salmon does freeze well. Do not let salmon sit out, in your car or on your counter. Fish spoils quickly and is very bad indeed!
To cook I rinse the fillet and pat dry. Using tweezers I keep in the kitchen for this purpose, I pull out any bones I find. If fillet is too big for the pan, cut it up.
This is a step you can include or skip, but if I have time, I like to start by roasting my spices a bit. I like to take a heavy pan, heat it and toss in about 2ish Tablespoons of the blackening spices(recipe below). Cook for a minute or two, stirring. You will notice it getting fragrant but don’t directly inhale it, it can be strong.  BEFORE it starts smoking, pour it onto a plate.
OR just start by pouring  a Tablespoon or two of spice mix (recipe below) on a plate.
In the same heavy pan, heat a few tsp of oil. You can skip the oil if you have a nice thick skin on the salmon and a non-stick pan. Press the skinless side of salmon into spice. Shake off excess. Lay salmon skin side down in pan. Let it heat in hot pan until the skin is getting a bit crispy and pulls away. Pick up with spatula and flip. Using spatula and tongs or whatever works, pull skin off fillet. Discard. Press a bit of spice on this side now. After a couple minutes, carefully turn over with spatula, trying not to lose the spicy crust. Cook a minute or so and see if it is done how you like it. I like salmon somewhat well done that is firm and pale pink throughout just beginning to be flaky but not too dry. Or cook until there is just a translucent shiny bit in the middle. Some people like it rarer than that. It is a personal thing.
I like to time this to be ready to serve when it is done. If you must, cover and keep warm for a few minutes.

Blackening spice basics
Make up the spice blend that may be used for 4-6 lb or so salmon or other fish or chicken. Once you make it store in a cool, dry place and use as needed. When using this to make fish, take out just what you need and throw away any that is left on the plate.
Vary the flavor by changing up the mix to suit your taste.
4 tsp, paprika
3 Tsp. old bay spice or other seafood mix ( if you don’t have this, use more  paprika, red pepper, onion, garlic  and maybe cumin or ginger)
3 tsp. Thyme
1 ½-2 tsp. garlic powder
1 ½-2 tsp. onion powder
1 ½-2 tsp, Dill or better yet Dill blend (such as Deliciously Dill with lemon, ginger)
2  tsp. salt
2 tsp. lemon pepper
1-2 tsp. ground black pepper
2 tsp sugar
1 tsp ground red pepper
½-1 tsp cumin
½ tsp ginger

Mix these together and if not using right away, store in airtight container.

Thanks to Zac and Kaitlyn for the nice photos!  Thanks for the suggestion Katie!


Recipe by DeniseBirdall 2011. All rights reserved

Tuesday, March 29, 2011

Spaghetti Squash Recipes


I love spaghetti squash but I feel like people have given it a bit of an identity crisis. It is often said that is the perfect substitute for pasta.  Even the name "Spaghetti squash" makes it sound like a hybrid between vegetable and pasta. However, I think we do spaghetti squash a disservice. It is a wonderful squash that has a unique texture and a subtle, mildly nutty flavor that works well with a variety of ingredients. It is not pasta. Okay, it does resemble spaghetti and it could be put it into most recipes that call for spaghetti and be a good fit J But I think it has many worthwhile qualities on its own and really is not just a stand in for pasta.
While spaghetti squash is not the powerhouse of nutrients that some other winter squashes are, it is low in calories with a good dose of fiber, and a decent dollop of vitamin C, a few B’s and manganese. Spaghetti squash recipes are very adaptable to a variety of food preferences and needs. For example, all of these recipes are gluten free and most can be made lactose free by nixing the cheese and using olive oil instead of butter. You can skip the bacon for vegetarians plus hold the cheese and butter for vegans. The marinara version and the spiced version can be made low in calories. Or pile on the bacon and cheese for your favorite omnivore. I love the versatility of this humble yet tasty vegetable.
I want to share my top four favorite ways to serve spaghetti squash.
Along with these recipes, I also like to serve it up simply with a bit of butter, salt, pepper and a sprinkle of parmigiano-reggiano. On a side note, parmigiano-reggiano is the best, official parmesan cheese from Italy. You could substitute other parmesan cheeses in these recipes but if you have the option, get parmigiano-reggiano! It is crazy good cheese in my opinion. Flavorful, complex, nutty, salty and tangy with a wonderful texture.  Pick up a little square of it. This is real parmesan cheese as it was created to be, not some waxy, flavorless wanna-be.  
Okay, back to our star today: Spaghetti squash. I usually try to get a nice large sized squash, free from blemishes and nicks. It can keep for up to 2-3 weeks in a cool place. Just make sure it stays feeling firm. I have heard it will taste better if you don’t store it too long but people have kept spaghetti squash for over a month and said it was fine.  
Any of these recipes could be a main dish or a side dish in a hearty meal. I would serve it with a nice crisp green salad and a crusty loaf of bread.
All of these recipes start with baking the squash so let’s just explain that once.
To Bake squash: wash and cut squash in half and remove the seeds and only the darker membrane strings around the seeds. Place cut side down in baking dish with a bit of water.  Bake uncovered in 375 oven for about 40 minutes. (In a pinch, if you must, you may also microwave for about 10-15 minutes. Check for doneness. If needed, continue to cook in microwave in 3 minute intervals till soft. This will not be quite as flavorful and fluffy as roasted.)
Spaghetti Squash with Marinara, Onion
and Peppers
Serves about 6-8
1 large spaghetti squash, baked, directions follow
1 large onion
1 bell pepper, any color
½  tsp. smoked paprika (or regular paprika, I just love the subtle smokiness)
1 tsp Italian herb blend
½ -1 tsp. cracked black pepper and salt, taste
½ tsp onion powder
1-2 cloves garlic pressed
1 can fire-roasted tomatoes, diced (About 15 oz)
1-2 cup marinara sauce (depending on the size of the squash, you don’t want to over sauce)
2/3 -3/4 cup grated cheese- mozzarella or Italian blend with parmesan  
2 TBSP parmigiano-reggiano

Prepare squash as directed above.
It works well to make the sauce while squash cools a bit.
Cut onion in half and then make vertical slim slices. To a large frying pan add 1-2 TBSPN olive oil and cook onion on low for about 10 minutes to lightly brown. Cut bell pepper into thin slices similar to onion. Add bell pepper to pan and cook for another 4 minutes. Add spices and stir. Then add diced tomato and marinara. Let it simmer a few minutes.
The squash should be cool enough now to use a fork to separate the strands from the shell of the squash. At this point, you can choose to mix the sauce and squash strands together. You can add 3/4 cup of cheese in and spoon everything into oiled rectangular 9 by 13 baking dish. OR if you prefer, you can layer it. Put a bit of sauce in the bottom of pan, place a layer of the squash, spoon some sauce over it and sprinkle with cheese. Continue to layer for two or three layers until you have everything in the pan.
Top with 2 TBSPN Parmigiano-Reggiano. You could add another handful of any cheese.
 This may be made several hours ahead and refrigerated at this point. If so, or if the squash has cooled off too much, pop it in a 400 degree oven for 6-12 minutes to heat it up and then continue with next step--
Place under broiler for a few minutes, checking often, until bubbly and starting to brown.

Smoky Spaghetti Squash
Serves about 6
1 large spaghetti squash, baked
6-8 strips bacon
1 onion, diced
1 tsp. smoked paprika,
½ -1 tsp. smoke-flavored pepper or ground black pepper
1 tsp. smoked salt or kosher salt( use One smoked salt or pepper and the other regular)
½ tsp.Onion powder
2 roma or other tomato, thinly sliced, optional
2/3 cup grated smoked cheddar, smoked gouda or other smoked cheese
2 TBSP parmigiano reggiano, grated

Prepare squash as described above.
Once squash is cool, use a spoon and fork to separate the strands from the shell of the squash.
While squash is cooking and cooling, crisp up 6-8 strips of bacon in large fry pan. Once they are cooked, remove to paper towel and drain most  of the grease and add onions to pan and lightly brown for about 5 minutes. Add squash, crumbled bacon bits and spices and stir until hot.
Place in rectangular baking dish. Sprinkle half of the smoked cheese then top with sliced tomato, if desired. Sprinkle with rest of cheese and parmesan.
(You may make this several hours ahead and refrigerate at this point. If you do, or if the squash has cooled off too much, you may pop it in a 400 degree oven for 6-12 minutes to heat it up and then continue with recipe and… )
Place under broiler for a few minutes, checking often, until bubbly and starting to brown.
 Spaghetti Squash Parmesan
Prep squash the same way as above. Once it is shredded but still hot, mix in 1/3 cup pesto and 1/3 cup parmigiano-reggiano, two cloves garlic-crushed, salt, pepper, 1 tsp. Italian herbs. If desired, thinly slice and brown a small onion in olive oil and add this, too. Place in greased baking dish or individual ramekins and top with sliced tomato. Add a generous sprinkle of parmesan. (If making ahead, you may refrigerate and heat in microwave or covered in 400 oven for 6-12 minutes)
Broil until top is brown and crispy, about 5 or so minutes but DO check after 3 minutes and continue checking often until done. This will burn quickly once it is done. 

Spiced Spaghetti Squash with  Walnuts
Prepare one small to medium squash as described above. Separate strands with fork and set aside.
 In a large shallow frying pan, heat up 2-3 TBSP unsalted butter. When thoroughly melted, add the following:
Approximately 1 tsp each salt and pepper
Approximately ½ tsp. each fresh ground nutmeg, ground coriander
Approximately ¼ tsp or a pinch each of cinnamon, ginger, crushed red pepper
Approximately ½ cup walnuts, coarsely chopped
Sauté for a minute or two until walnuts barely begin to turn golden and fragrant and add strands to pan. Mix thoroughly and cook for just a minute. Serve immediately. If desired, sprinkle with parmesan cheese.
Recipes by Denise Birdsall

Friday, March 25, 2011

Carrot Cake with Cream Cheese Frosting

There is a wonderful cake that I often make for birthdays and other special events. This week I made it for my daughter’s birthday. She requested it. It is from a cookbook I have had for over 30 years! This book has seen better days. It is torn and tattered and three or four pages carry smudges and a dusting of flour along with pencil written notations of an earnest new cook. People laugh when they see it and someone even remarked that I “need to get a new one” so let me quote a childrens’ book I hope you all have read, The Velveteen Rabbit:
"What is REAL?" asked the Rabbit one day, when they were lying side by side near the nursery fender, before Nana came to tidy the room. "Does it mean having things that buzz inside you and a stick-out handle?"
"Real isn't how you are made," said the Skin Horse. "It's a thing that happens to you. When a child loves you for a long, long time, not just to play with, but REALLY loves you, then you become Real."
"Does it hurt?" asked the Rabbit.
"Sometimes," said the Skin Horse, for he was always truthful. "When you are Real you don't mind being hurt."
"Does it happen all at once, like being wound up," he asked,"or bit by bit?"
"It doesn't happen all at once," said the Skin Horse. "You become. It takes a long time. That's why it doesn't happen often to people who break easily, or have sharp edges, or who have to be carefully kept. Generally, by the time you are Real, most of your hair has been loved off, and your eyes drop out and you get loose in the joints and very shabby. But these things don't matter at all, because once you are Real you can't be ugly, except to people who don't understand."  (The Velveteen Rabbit OR How Toys become Real  by Margery Williams, 1922)

This is one of my “real” cookbooks. It is The Los Angeles Times California Cookbook, edited by Betsy Balsley in 1981. On page 328, a very loved page, there is a recipe for 14-Carat Cake, which is the best carrot cake I have ever tasted.
I have not changed the recipe much as I copied it here. I did correct a slight error in the directions. Carrot cake has to be one of the easiest cakes to make and it seems to do well in our high altitude here in Colorado as well as sea level back in So Cal.
Perhaps my favorite part of this cake is the cream cheese frosting. I don’t usually like frosting but this is not like most frosting; it tastes great and is not too sweet or greasy. I do use less sugar than called for in the recipe and it works well. I sometimes think that the cake is more like a vehicle for the frosting J
14 –Carat Cake 
From L.A. Times Cookbook
2 cups flour
2 tsp baking powder
1 ½ tsp baking soda
1 tsp salt
2 tsp cinnamon
4 eggs
2 cups sugar
1 ½ cups oil ( You can substitute ½ cup oil with ½ cup applesauce)
2 cups grated carrot ( I usually throw in another ½ cup)
1 (8 oz) can crushed pineapple, drained ( If you don’t want to use pineapple, you may substitute applesauce)
½ cup chopped walnuts or pecans  ( I use 2/3  cup)

Preheat oven to 350. (In large wire sieve or sifter) sift together flour baking powder, soda, salt and cinnamon. In another bowl, beat eggs then add sugar and let stand till sugar dissolves, around 10 minutes.  Fold flour mixture into egg mix and blend then mix into that oil, carrots, drained pineapple and nuts.
Grease and flour either 3   9-inch cake pans or a 13X9 inch rectangular baking pan.  (You may use parchment paper in pan for extra safety in removing from pan)
Place in 350 oven 35 – 40 minutes for 9-inch layer pans or about 50 to 55 for rectangular pan. Check by touching to see if it springs back and if the sides are set but not overdone. Cool in pans for 10 minutes then gently run knife around the edge and let cooling continue in pan on wire rack for 15 - 20 minutes more if you are removing cake to frost or layer.
I leave cake in rectangular pan and just frost and serve from pan if I am not worried about how it looks, which is much easier but not so pretty. Layered looks stunning.
Frost with cream cheese frosting


Cream cheese frosting
I make this ahead of time and refrigerate to set it up a bit. Buy C&H or other good quality powdered sugar only, some bargain or store brands have not been acceptable.

½ cup butter, slightly softened
1 (8 oz) package of cream cheese, softened, regular or light but not fat free
1 tsp vanilla
¾ -1 lb powdered sugar, sifted ( I don’t  use a whole lb. usually about ¾ or more just add till consistency and taste are right)

In a large bowl combine butter, Cream cheese and vanilla and beat until completely incorporated and smooth. I like to use my stand mixer but any mixer will do. This can also be done by hand but be very vigorous and take the time to get the nice, light loftiness that makes this frosting great. Add sifted powdered sugar a cup or so at a time and beat vigorously until smooth. You don’t have to sift the sugar if it is powdery and not clumping. It is usually fine here in dry Colorado.  I don’t use a whole lb. usually about ¾ of a pound, just add till consistency and taste are right,
It is best to refrigerate a bit. If it is too thick when it comes time to spread, add a little bit of milk.

                                            My son and Daughter

Monday, March 21, 2011

Ruby Chard with pears, red onion and balsamic reduction sauce


       Ruby chard is definitely a new favorite of mine. Perhaps two recipes with chard in a week are a bit  much but I just wanted to share this as it would be a nice side dish for the Mac and cheese.
I played around a bit with the basic recipe I use for sautéed greens. I cooked the stalks this time, which I don’t usually do. The red stalks add a lot visually to the recipe and they keep their color since they are cooked separately. They also are full of flavor and nutritional value. I will admit that the flavor can sometimes be a little bitter, which is why I decided to add a pear to this version of sautéed ruby chard. Plus, I had several ripe pears around waiting to be eaten. The pear was a superb addition, adding a hint of sweetness and subtle undertones.
Speaking of nutrition, chard is a powerhouse. It is a rich source of vitamins K, C, and A and minerals like copper, calcium, sodium, potassium, iron, manganese and phosphorus. It is a good source of phytonutrients, B vitamins, protein and fiber while being low in calories. Can you see why I like serving it at my table? But it is not just the nutrition, it is the taste!!
Give this dish a try. It had everyone here raving! Just remember, even though the stalks give you slightly more volume, one bunch of chard can only serve about four people. If you have a bigger group, double this recipe.

   Ruby Chard with pears, red onion  and balsamic reduction sauce
Ruby chard- 1 large bunch, stalks and leaves
1 small or ½ large red onion
2 tsp olive oil
1 garlic clove, pressed
½ tsp onion powder, pinch of red pepper
¼ cup balsamic vinegar
1 tsp. sugar
2 more tsp. olive oil
One ripe pear
Salt and pepper to taste

Thoroughly wash ruby chard. Trim the ends of the stalks and use sharp knife to cut along stems and pulling to remove. Finely slice stalks. Thinly sliced, cut up red onion. Pour 2 tsp. olive oil into large pan and add onions and stalks. Cook over medium heat for 6 minutes then add clove of garlic, pinch of red pepper flakes and onion powder and cook about 2 more minutes or until onion is translucent and stalk pieces are softened.

Remove stalks, onion to bowl and heat balsamic vinegar and sugar, cooking  on med-low for 4-5 minutes until slightly reduced and thickening. Meanwhile cut leaves into smaller pieces and peel and dice pear. Pour balsamic reduction over stalk mix in bowl. Add another 2 tsp olive oil to the pan. Add leaves and pears. Cook, stirring, for 2 minutes or so until wilted and soft. Re add the stalks and all liquid into the leaves and mix well. Salt and pepper to taste.

Saturday, March 19, 2011

A Better Mac and Cheese


We celebrated a couple of birthdays here last night. It was a hodgepodge mix of food --trying to cook something each of them would like but even though the menu might be a weird mix, it was a fun evening. Shall I tell you what we had? Okay, we had a nice bowl of corned beef, cabbage and veggies for my daughter who was not able to have her favorite St Patrick’s day meal and this beloved Mac and cheese for our friend who likes cheese---a lot. For dessert, we had Matcha shortbread cookies, since Kaitlyn loves green tea and Chocolate cake. Although the combo won’t win any awards, we all thought it was quite a fine mix of flavors J

I would like to share the Mac and cheese recipe with you.  Please put out of your mind the neon box mix type of mac and cheese along with the flavorless glop that is sometimes the result of “homemade” mac and cheese recipes.  I happened upon this recipe a few years ago while watching one of my favorites on the food network—Ina Garten. I love her recipe and watching her cook makes me smile. Isn’t she just someone you would want to know?  Her recipe for Mac and cheese looked so delicious I had to try it. I have modified it a bit. For example, I do not buy the more expensive cheese, even though Gruyere would probably have an even nicer texture. I use less cheese and butter altogether. You could check out her recipe and use more but I am trying to cut some of the calories. Sorry my calorie counting friends. This is not a diet friendly dish. As usual, I added more spices, which can be modified to your taste.

I think the things that make this Mac and Cheese stand out are the flavor and texture of the dish. The cheese is the star here and using Swiss or Gruyere and sharp or extra sharp cheddar make all the difference! Please try it with the sharper cheese and see what I mean. The spices also help make this special. For us, the tomatoes are also central to making this Mac & cheese spectacular. They bake up so sweet and creamy—a wonderful way to eat tomato! The crispy topping  adds an awesome layer of texture. Have you used panko before?  You might need to look in the Asian food section of your market but it is well worth a search. It holds it’s crunch better than anything and I use it in all my bread crumb recipes. If you can’t find panko or you prefer, Ritz crackers are also a flavorful, crunchy topping. Plus, it is fun to put them in a baggie and crush them to bits.


A note on the spices used. You will find Nutmeg in Ina’s original recipe and here. Nutmeg is a super spice. Used in small quantities, nutmeg brings out wonderful qualities in cream sauces! Freshly grated nutmeg is really the best and whole  keeps well, too.  I add it to pumpkin, butternut squash and any dish with a cream base- pasta recipes, desserts, and soups. Try it. I also add a bit of smoked paprika but not too much. Just a hint gives this recipe a complex flavor we enjoy but you may substitute regular paprika if you prefer. I like the color with paprika and using spice to improve the appearance of a dish is a nice cooking trick. Turmeric and paprika can warm up the look of food.

Most recipes I will share here are basically original- well, as original as a recipe can be since I am sure someone else has come up with most of the same combinations before me. But, I wanted to share this slightly modified  recipe as it is very worth repeating. I am a new blogger so I hope I have cited it correctly and all.


Mac and Cheese                                                              Serves about 8-10
Modified from recipe by Ina Garten

1 pound elbow macaroni or cavatappi—whole wheat is a good choice
Olive oil, Kosher salt
4- 4 1/2 cups milk ( low fat works fine)
6 tablespoons unsalted butter
1/3 cup all-purpose flour
2-2 1/2 cups Swiss or Swiss/ Gruyere blend, grated
1 ½ -2 ½  cups sharp or extra-sharp Cheddar, grated
1 teaspoon each freshly ground black pepper, onion powder
1/2 teaspoon  each fresh ground nutmeg, thyme, garlic powder, smoked paprika
3 teaspoons salt
3 ripe tomatoes
1 1/2 cups Panko breadcrumbs or Ritz crackers, crushed
2 Tablespoons butter

Preheat the oven to 375 degrees F. Drizzle oil into a large pot of boiling salted water. Add the macaroni and cook according to the directions on the package, 6 to 8 minutes. Drain well.
Meanwhile, heat the milk in a small saucepan or in a bowl in the microwave, but don't boil it. Melt 6 tablespoons of butter in a large (4-quart) pot and add the flour. Cook over low heat for 2 minutes, stirring with a whisk. While whisking or stirring constantly, add the hot milk and spices, seasonings and cook for a few minutes until thickened, smooth and just beginning to bubble. Be sure to keep stirring all the way through to the bottom of the pot. Once velvety and thickening up a bit, remove from the heat, and add the Swiss, Cheddar. Add the cooked macaroni and stir well. Pour into a 3-quart buttered or oiled baking dish.
Thinly slice the tomatoes and arrange on top. Melt the remaining 2 tablespoons of butter, combine them with the cracker or panko breadcrumbs, and sprinkle on the top. Bake for 30 minutes, or until the sauce is bubbly and it  is lightly browned on the top.

Modified from original recipe by Barefoot Contessa ,Family Style Copyright, 2002,  http://www.foodnetwork.com/recipes/ina-garten/mac-and-cheese-recipe2/index.html

Thursday, March 17, 2011

Lemon Squares


There are many things I love about having guests over to have dinner. One thing is that I usually make a dessert to share. I am not sure if I can limit myself to a favorite flavor for dessert but along with chocolate, almond and apple- I love lemon! It is an especially refreshing and crisp finish to a heavy dinner.
 I have a handful of dessert recipes that I have been enjoying for years and this is one of them. Around 30 years ago, I was getting ready to throw away an empty bag of flour. I think  it was Gold Medal. Anyway, I saw a recipe on the back for Lemon Squares and thought they sounded good so I cut the recipe out. Over the years, I have modified the recipe slightly and I have been making it every since! I have added more Lemon zest and juice as well as a bit of lemon extract to make this a little more tart. I like my lemon squares to have a nice tartness offset by the sugar. I tried making these once with Meyers lemons, which was a mistake since they are much milder and there was very little "bite." I sometimes want to use a 1/4 cup of juice in the filling and sometimes I like to add a half cup. As you see in the recipe, if you use a half cup, add a bit of flour to the filling mix so it will have a good texture.
I hope you and your guests enjoy these tart, tasty treats after your next dinner!

Lemon Squares

Crust:
2 cup flour
½ cup powdered sugar
2 sticks  (1 cup)butter, softened
Optional- 2-3 teaspoons lemon zest     1/3 cup finely chopped walnuts,

Filling:
4 eggs
1 2/3 -2 cups sugar (depending on how tart you want)
1 teaspoon baking powder
1/4 teaspoon salt
1- ½ Tablespoon lemon zest (add more if you wish)
¼ to ½ cup  lemon juice ( If you use ½ cup you will need to add 1-2 Tablespoons flour)
1 teaspoon lemon extract, optional

Topping: powdered sugar

This recipe will use a total of two or maybe three whole lemons. First, wash the lemons well and dry them off. Then remove the zest by using a zester or fine or micro-plane grater. The zest is the yellow outer part of the skin. Do not use the white layer. If the pieces of zest or not very fine, use a large knife to finally mince the zest strips into tiny bits. Next, remove all the juice from the lemon and pour into measuring cup. Now you are ready to decide how much you will use. If you there is any left over, you may combine juice and lemon and freeze or refrigerate until needed.

Sift flour and powdered sugar together. Cut in butter until well blended. If desired, add nuts and/or zest. Press mixture over bottom of a 9 x 13 x 2-inch pan with a bit up the sides. It will look a bit dry and powdery.  Bake about 20 minutes at 350° until lightly browned.

Combine sugar and eggs and beat until foaming, fluffy and yellow. Add remaining ingredients and beat .  Pour and spread on top of the hot baked crust. Bake at 350 for 23 to 28 minutes until golden edged  and set  so that no indentation remains when touched.  Remove and let cool. Sprinkle with powdered sugar. When cool cut into small squares. If there are any left, store in air-tight container.  

Tuesday, March 15, 2011

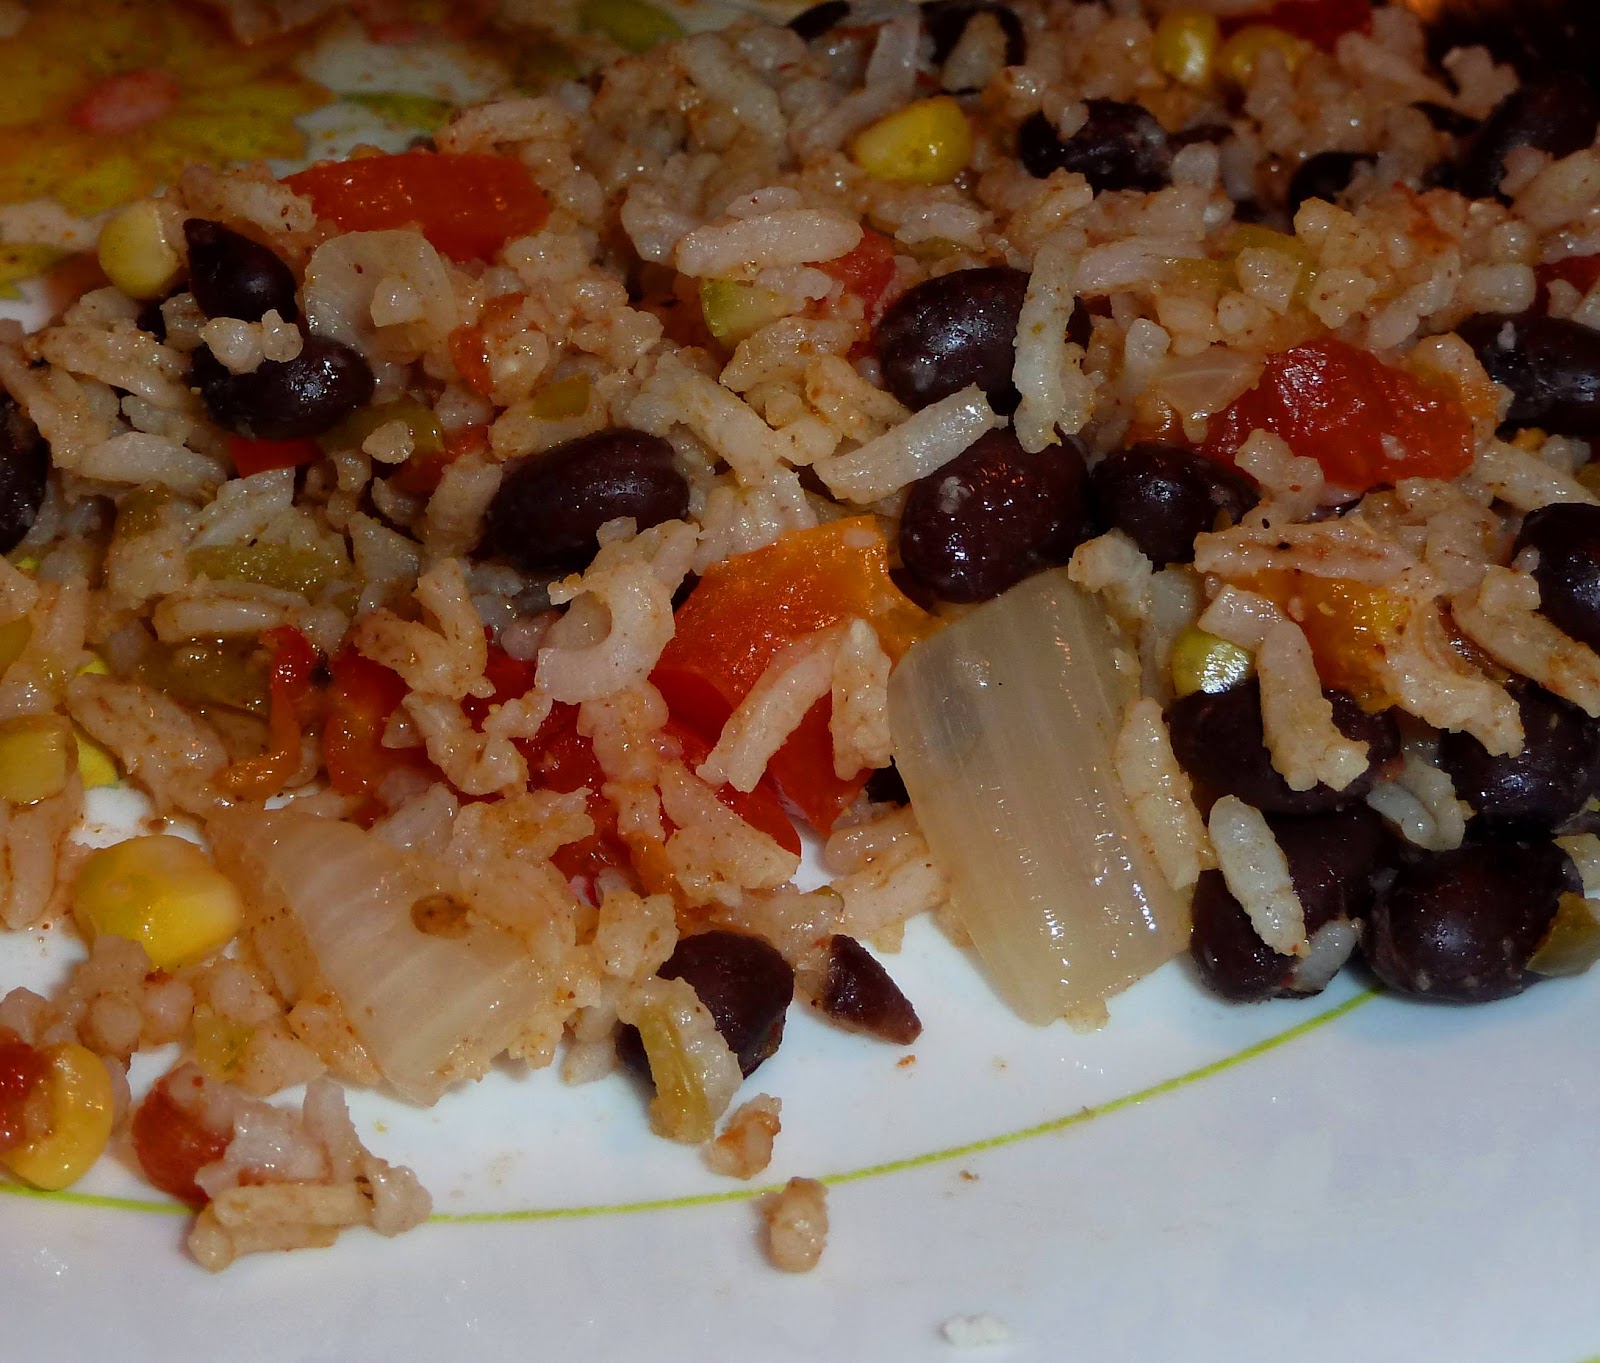
Rice with Black Beans, Peppers and Corn


  It seems like we often focus on the main dish when we plan our menu and side dishes are not really given much thought.  I wanted to share the side dish that I served with the Enchiladas. This partnership is so good, I thought I ought to give you the recipe for this tasty rice dish.

 This can be a main dish for lunch or a light dinner. Leftovers make great burritos. It is terribly easy to make and you can pick and choose what you would like to include. You could use pinto beans instead or skip the bell pepper. You could adjust the spice to your liking. But here is the basic recipe that I like.

Rice with black beans and corn

1 ½ -2 cups raw white rice, basmati, jasmine or other long grain or long grain brown rice (cooked according to package instructions **)
1 tablespoon olive oil , more as needed
1 small onion,  chopped, red looks best
½ -1 red bell pepper, diced
½ green or yellow bell pepper, diced
1 small can diced green chili or 1 anaheim or jalapeno pepper, minced
1 ½ tsp ground cumin
1 tsp chili powder, oregano, onion powder, garlic powder, smoked paprika*
½  tsp chipotle powder
Salt and pepper to taste
1 cup frozen corn
1 can diced tomatoes (Rotelle original is a good choice)
1-2 tablespoons lime juice
1 (15 ounce) cans black beans, drained and rinsed in colander
2 dashes hot sauce
1/2 cup cilantro chopped, optional  


*The amount of spice is a very adaptable to various palates- add more or less of the flavors you like. It is completely up to you but a bit of spice is nice in this dish and the oregano is that subtle but important hint in Spanish rice.

Cook rice in a rice cooker or pot. While it is cooking, heat oil on low in large fry pan. Add onion and cook for five minutes or so, then add peppers,spices and cook for a couple minutes more. Add corn, beans, lime juice, hot sauce blend and cooked rice and stir gently but thoroughly, adding extra olive oil if needed. Sprinkle in cilantro. 

**Another way to do this is to heat oil in pan, add one chopped onion. Cook on low for 5 minutes. Add WHITE rice, stir. Add peppers, chilies, spices and cook 2 more minutes. Add BROTH or water as directed on package . Add Corn, tomato. Bring to simmer, cover and cook on low 20 minutes. Add lime juice, beans, cilantro, hot sauce. Add cilantro right before serving.